 So animated gifs are awesome if you’re writing a software blog. It saves all this time working with YouTube embeddings and stuff, and your “videos” are stored locally. The simplified FFMPEG writer was before unable to output animated GIFs, but I’ve tweaked it and now it does. It’s also a nice piece of code to learn how to FFMPEG in C.
Tag: code

 Hi!
Hi!
I would like to present something I have been working on recently, a work that immensely affect what I wrote in the blog in the past two years…
To use it:
Go on this page,
Watch the short instruction video,
download the application (MacOSX-Intel-x64 Win32)
and make yourself a model!
It takes just a couple of minutes and it’s very simple…
This work is an academic research project, Please please, take the time to fill out the survey! It is very short..
The results of the survey (the survey alone, no photos of your work) will possibly be published in an academic paper.
Note: No information is sent anywhere in any way outside of your machine (you may even unplug the network). All results are saved locally on your computer, and no inputs are recorded or transmitted. The application contains no malware. The source is available here.
Note II: All stock photos of models used in the application are released under Creative Commons By-NC-SA 2.0 license. Creator: http://www.flickr.com/photos/kk/. If you wish to distribute your results, they should also be released under a CC-By-NC-SA 2.0 license.
Thank you!
Roy.
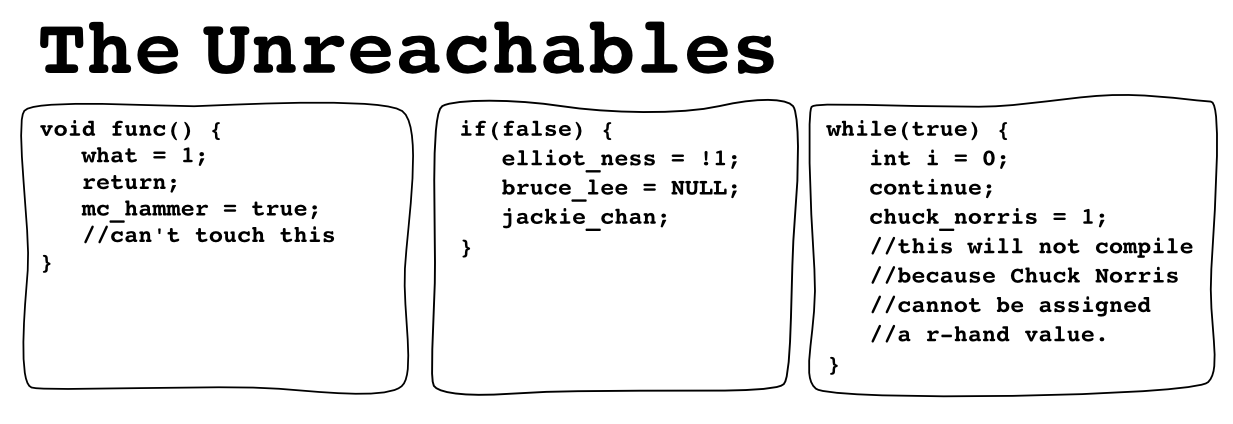
The Unreachables [comic]

Hi
Just a quick share of lessons learned about Android’s Frame-by-Frame animations. Some of the functionality is poorly documented, as many people point out, so the web is the only place for answers. Having looked for some answers to these questions and couldn’t find any – here’s what I found out myself.
Update [2/3/11]: A new post on this topic gives a more broad view of my experience.
 Hi
Hi
Just wanted to share a thing I made – a simple 2D hand pose estimator, using a skeleton model fitting. Basically there has been a crap load of work on hand pose estimation, but I was inspired by this ancient work. The problem is setting out to find a good solution, and everything is very hard to understand and implement. In such cases I like to be inspired by a method, and just set out with my own implementation. This way, I understand whats going on, simplify it, and share it with you!
Anyway, let’s get down to business.
Edit (6/5/2014): Also see some of my other work on hand gesture recognition using smart contours and particle filters
Hi,
Just wanted to share a bit of code using OpenCV’s camera extrinsic parameters recovery, camera position and rotation – solvePnP (or it’s C counterpart cvFindExtrinsicCameraParams2). I wanted to get a simple planar object surface recovery for augmented reality, but without using any of the AR libraries, rather dig into some OpenCV and OpenGL code.
This can serve as a primer, or tutorial on how to use OpenCV with OpenGL for AR.
Update 2/16/2015: I wrote another post on OpenCV-OpenGL AR, this time using the fine QGLViewer – a very convenient Qt OpenGL widget.
The program is just a straightforward optical flow based tracking, fed manually with four points which are the planar object’s corners, and solving camera-pose every frame. Plain vanilla AR.
Well the whole cpp file is ~350 lines, but there will only be 20 or less interesting lines… Actually much less. Let’s see what’s up
 ICP – Iterative closest point, is a very trivial algorithm for matching object templates to noisy data. It’s also super easy to program, so it’s good material for a tutorial. The goal is to take a known set of points (usually defining a curve or object exterior) and register it, as good as possible, to a set of other points, usually a larger and noisy set in which we would like to find the object. The basic algorithm is described very briefly in wikipedia, but there are a ton of papers on the subject.
I’ll take you through the steps of programming it with OpenCV.
 Hi
Hi
Been working hard at a project for school the past month, implementing one of the more interesting works I’ve seen in the AR arena: Parallel Tracking and Mapping (PTAM) [PDF]. This is a work by George Klein [homepage] and David Murray from Oxford university, presented in ISMAR 2007.
When I first saw it on youtube [link] I immediately saw the immense potential – mobile markerless augmented reality. I thought I should get to know this work a bit more closely, so I chose to implement it as a part of advanced computer vision course, given by Dr. Lior Wolf [link] at TAU.
The work is very extensive, and clearly is a result of deep research in the field, so I set to achieve a few selected features: Stereo initialization, Tracking, and small map upkeeping. I chose not to implement relocalization and full map handling.
This post is kind of a tutorial for 3D reconstruction with OpenCV 2.0. I will show practical use of the functions in cvtriangulation.cpp, which are not documented and in fact incomplete. Furthermore I’ll show how to easily combine OpenCV and OpenGL for 3D augmentations, a thing which is only briefly described in the docs or online.
Here are the step I took and things I learned in the process of implementing the work.
Update: A nice patch by yazor fixes the video mismatching – thanks! and also a nice application by Zentium called “iKat” is doing some kick-ass mobile markerless augmented reality.
Justin Talbot has done a tremendous job implementing the GrabCut algorithm in C [link to paper, link to code]. I was missing though, the option to load ANY kind of file, not just PPMs and PGMs.
So I tweaked the code a bit to receive a filename and determine how to load it: use the internal P[P|G]M loaders, or offload the work to the OpenCV image loaders that take in many more type. If the OpenCV method is used, the IplImage is converted to the internal GrabCut code representation.
Image<Color>* load( std::string file_name )
{
 if( file_name.find( ".pgm" ) != std::string::npos )
 {
 return loadFromPGM( file_name );
 }
 else if( file_name.find( ".ppm" ) != std::string::npos )
 {
 return loadFromPPM( file_name );
 }
 else
 {
 return loadOpenCV(file_name);
 }
}
void fromImageMaskToIplImage(const Image<Real>* image, IplImage* ipli) {
 for(int x=0;x<image->width();x++) {
 for(int y=0;y<image->height();y++) {
 //Color c = (*image)(x,y);
 Real r = (*image)(x,y);
 CvScalar s = cvScalarAll(0);
 if(r == 0.0) {
 s.val[0] = 255.0;
 }
 cvSet2D(ipli,ipli->height - y - 1,x,s);
 }
 }
}
Image<Color>* loadIplImage(IplImage* im) {
 Image<Color>* image = new Image<Color>(im->width, im->height);
 for(int x=0;x<im->width;x++) {
 for(int y=0;y<im->height;y++) {
 CvScalar v = cvGet2D(im,im->height-y-1,x);
 Real R, G, B;
 R = (Real)((unsigned char)v.val[2])/255.0f;
 G = (Real)((unsigned char)v.val[1])/255.0f;
 B = (Real)((unsigned char)v.val[0])/255.0f;
 (*image)(x,y) = Color(R,G,B);
 }
 }
 return image;
}
Image<Color>* loadOpenCV(std::string file_name) {
 IplImage* im = cvLoadImage(file_name.c_str(),1);
 Image<Color>* i = loadIplImage(im);
 cvReleaseImage(&im);
 return i;
}
Well, there’s nothing fancy here, but it does give you a fully working GrabCut implementation on top of OpenCV… so there’s the contribution.
GrabCutNS::Image<GrabCutNS::Color>* imageGC = GrabCutNS::loadIplImage(orig);
 GrabCutNS::Image<GrabCutNS::Color>* maskGC = GrabCutNS::loadIplImage(mask);
 GrabCutNS::GrabCut *grabCut = new GrabCutNS::GrabCut( imageGC );
 grabCut->initializeWithMask(maskGC);
 grabCut->fitGMMs();
 //grabCut->refineOnce();
 grabCut->refine();
 IplImage* __GCtmp = cvCreateImage(cvSize(orig->width,orig->height),8,1);
 GrabCutNS::fromImageMaskToIplImage(grabCut->getAlphaImage(),__GCtmp);
 //cvShowImage("result",image);
 cvShowImage("tmp",__GCtmp);
 cvWaitKey(30);
I also added the GrabCutNS namespace, to differentiate the Image class from the rest of the code (that probably has an Image already).
Code is as usual available online in the SVN repo.
Enjoy!
Roy.

